Home NIDS (Network Intrusion Detection System)
Introduction
Note
This is still a work in progress, I have hit another brick wall getting traffic to mirror to the pi correctly, which has proved a lot more difficult when first starting this project. Either way it should be an interesting project to finsih when i can afford to spend a little on some better hardware (I'm thinking I need a better router for this to properly work).
Interesting side note about LLMs: I use llms like claude and chatgpt quite regularly (very similar to how I would use a search engine a few years ago). One thing I've noticed is how terrible llms are at networking and security information. The recommendations are almost always logically incorrect. For example, chatgpt keeps thinking a viable soultion to capturing all traffic on a WIFI network I'm connected to, is monitor mode on a wifi card, but hopefully if you're reading this you understand this is a garbage repsone, yet every fresh context the llms get this wrong. I think I know why... When i first started getting into ethical hacking, I would read these guides online that would seemingly tell you how to bypass security on device; however, the articles would almost always take you down a rabbit hole then get to point where there's a non trivial barrior (tpically cryptography), and then just skip that step and jump to some wild conconlusion. Anyway, given the sheer number of disinformation articles online, it's no wonder why LLMs are so poorly trained on this topic, they have simply digested as much, if not more, bad data then good data, which just goes to show the actual illusion of thought.
I have been interested in cyber security and ethical hacking for a long time, so why not build an over kill security system for my home WIFI! In this article I will show you how I built a NIDS system running on Raspberry pi 4.
This article is primary based off this Reddit post which is based off this blog post. I’m not the first to do this, but either way it was an interesting process with a few hurdles. This is just an updated version with a few tweaks and additional features. Please use the following information responsibly.
The hardware for this project will included:
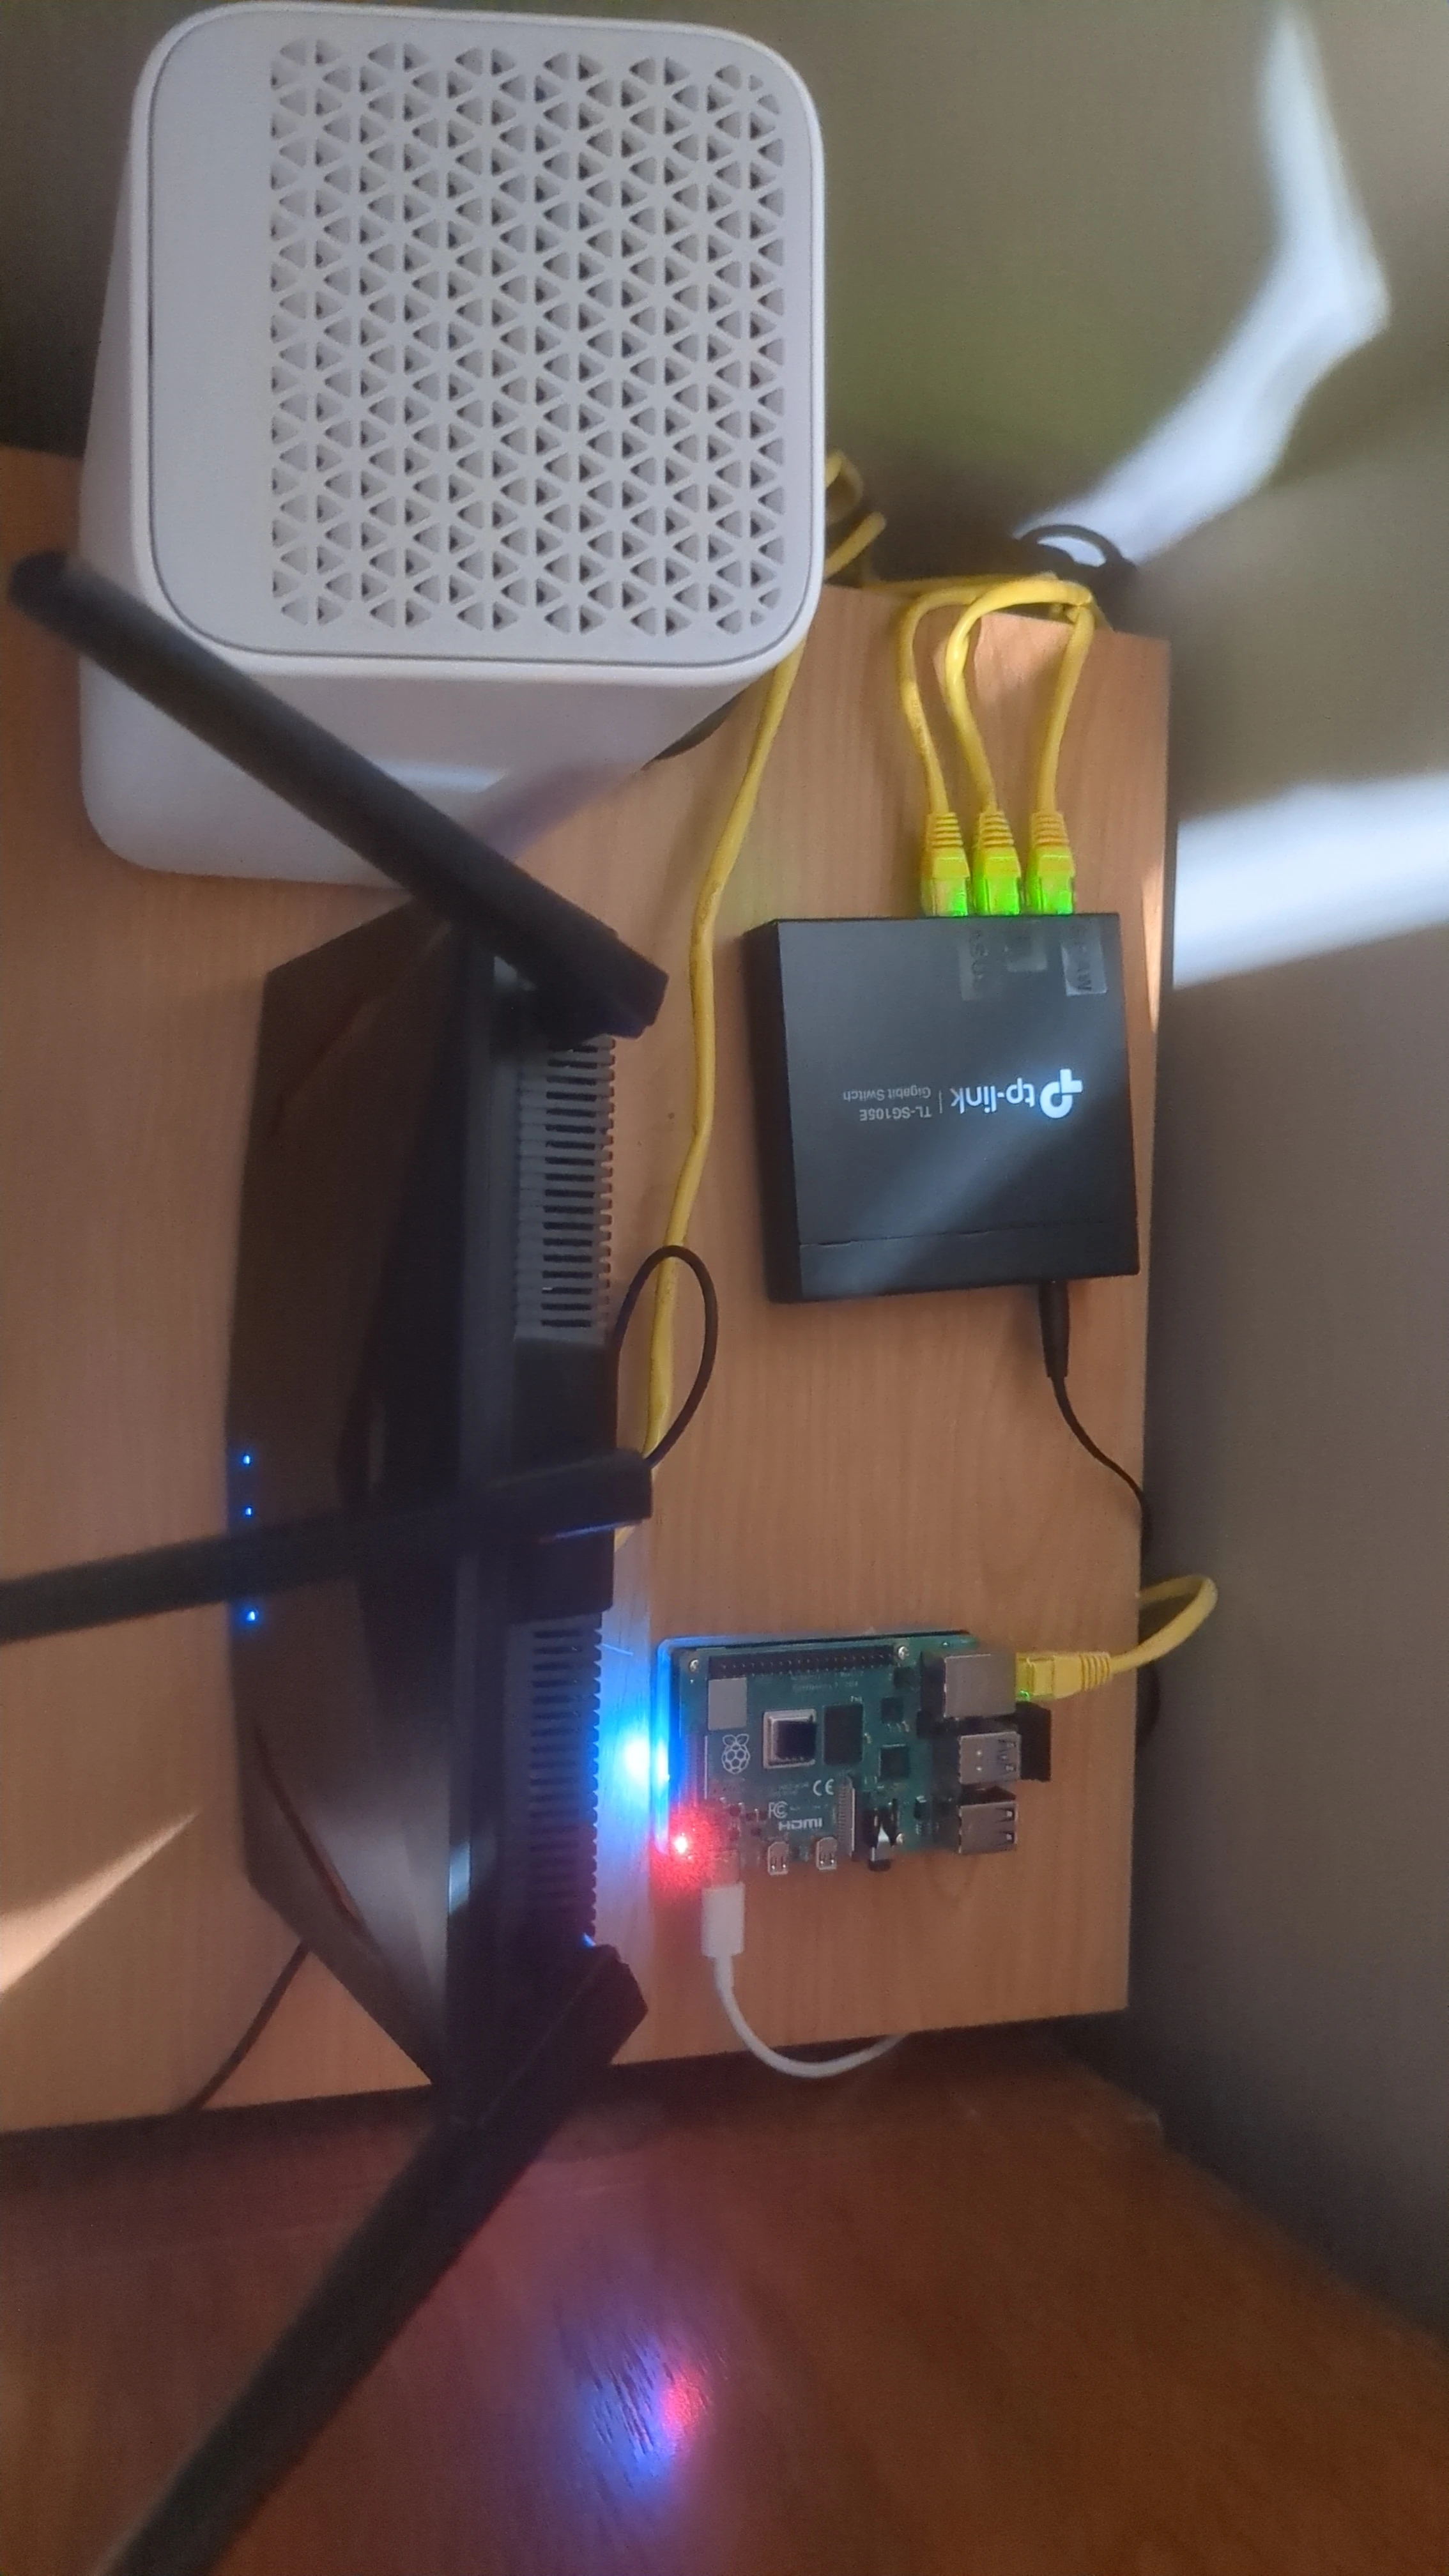
- Raspberry PI 4 (2G): I do not recommend a PI for this project as there are much better deals on x86 hardware with fewer anonying issues. I'm using the 2G, but the 4G, 8G or even the 5B would be much better.
- NVME and Shield: I'm using a Toshiba NVME and the GeeekPi M.2 NVME shield to mount it to the PI.
Wifi Dongle with managed/promiscuous mode: The default wifi dongle on the raspberry pi 4 is not capable of promiscuous mode, so we need to use a wifi dongle that supports it. I'm using the TP-Link TL-WN725N.A switch with port mirroring:- A Router (other than your ISP's): Just to be on the safe side make sure you're only using hardware you own. Additionally, you are going to need a router that supports mirroring the traffic one way or another.
- A Custom PI Sheild: Custom sheild with led to alert me of attacks and a buck converter for a 12v 1A power supply and 12v fan.
The software (Tech stack) I will be using:
- Suricata: The actual NIDS software that contains rules for network security.
- ELK stack: The stack that will be used to store and visualize the data from suricata.
- Elastic search: The database that will store the data from suricata.
logstash:The data pipeline that will be used to store the data from suricata.- Fluent Bit: A lightweight log shipper that will be used to store the data from suricata.
- Kibana: The visualization tool that will be used to visualize the data from suricata.
- Docker: The containerization platform that will be used to containerize the elk stack (for ease of installation).
The hardest part of this project has been correctly getting the traffic to route/mirror to the pi. I had to change the way this system worked a few times due to praticallities when using a home wifi router:
The ultimate aim is to mirror all traffic on the network (both wired and wireless) and pass it to the Raspberry Pi so that Suricata can analyze it for intrusion detection.
Attempt 1 (switch with port mirroring)
Ideally this would have worked by connecting a switch with port mirroring between the router and the moden. Capturing all traffic on the mirrored port connected to the pi. On a enterprise system this would be the typicall nids setup, but it doesn't work so well at home because the switch would be behind the NAT (network address translation) on a home router. The NAT is a problem because the ELK stack can't figure out if the connection to website a.com came from computer 1 or computer 2 on the network. The other solution was moving the switch within the router and capturing all traffic however this also doesn't work because wired connections and air connections are seperated (for secuirty) on the model of router I'm using, also the router has to support this mirroring.
Attempt 2 (Wifif dongle)
I decided to try something more expiremental. I care more about the air connections than wired connections, so that's where the wifi dongle came in. There's a few ways to go about this, one if the dongle can support promiscous/monitor mode you could simply listen to all WIFI traffic and decrypt the correct WIFI with a command like this tshark -i wlan1 -o wlan.enable_decryption:TRUE -o "uat:80211_keys:\"wpa-pwd\",\"yourpassword:ssid\"". The interesting thing about this option is the possiblitly of monitoring multiple wifi networks, but the use cases are limited and there are some stability issues with consumer hardware (and i don't want to shell out a ton of money for a really good wifi dongle like $250 CAD).
Attempt 3 (regular wifi connection)
The other option is to just connect to the WIFI network using network manager or even wpa_supplicant directly, then listening for a network traffic similar to having the switch on the inside of the router network using a man-n-the-middle attack sudo arpspoof -i wlan0 -t <target_ip> <gateway_ip>. Not only does this have the same issue where it will only see air traffic and not wired traffic, but also it's too hacky to be a long term solution running all the time (and probably will disrupt regular network traffic).
Attempt 4 (reconfigure the routers iptables)
The nice thing about the router I have is that it has ssh login, root access, so I can mess around with the firewall directly with commands like iptables, which will allow me to add the necessary rules to route all traffic before the NAT to the PI! No need for a switch and I circumvent the security features. This is overall a great feature and I can even utilize this type of root access to harden the router beyond what the manufature set.
Or so i thought. The issue is that this router doesnt have the TEE module by default. The tee module works by allowing a mangle rule to basically mirror the traffic. You can check if you have the module by simiply running lsmmod | grep tee which is great if it's already a module you can just load then add a firewall rule like iptables -t mangle -A PREROUTING -d <original_ip> -j TEE --gateway <mirror_ip> but if on the other hand your route doesn't have the module you likely need to compile it, there's no source code and installing Open Router has proved to be very tricky in the past, so I'm going to admit defeat on this one, or possibly buy an openwrt router in the future (though that's not ideal for a goofy/academic project). Anyway here's the rest of the porject that has thus far been successful.
1. Setting up the Raspberry Pi
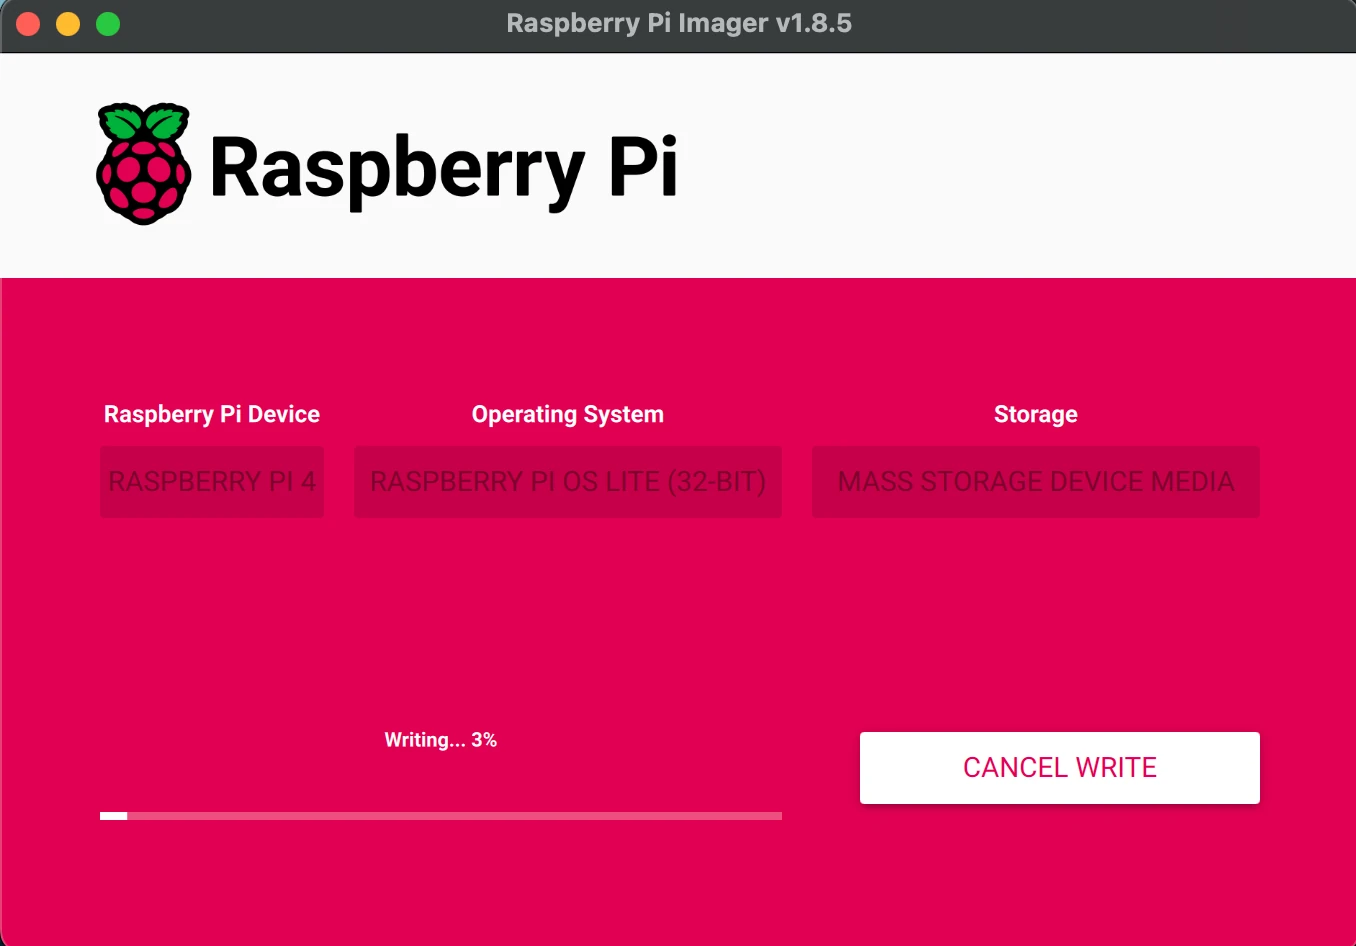
The first thing we need to do is image the PI with a fresh install of Raspberry Pi OS. I'm using the headless version of Bookworm for this project. Though i could do this with dd and raspi-config but I'm using macos and I find that drives never work as expect on macos. So I'm using the Raspberry Pi Imager to image the drive.
This is very straight forward, just make sure you configure the correct wifi credentials, hostnamename, password and ssh key. Run ssh-keygen on your host machine and copy your public key cat ~/.ssh/id_rsa.pub to the imager interface.
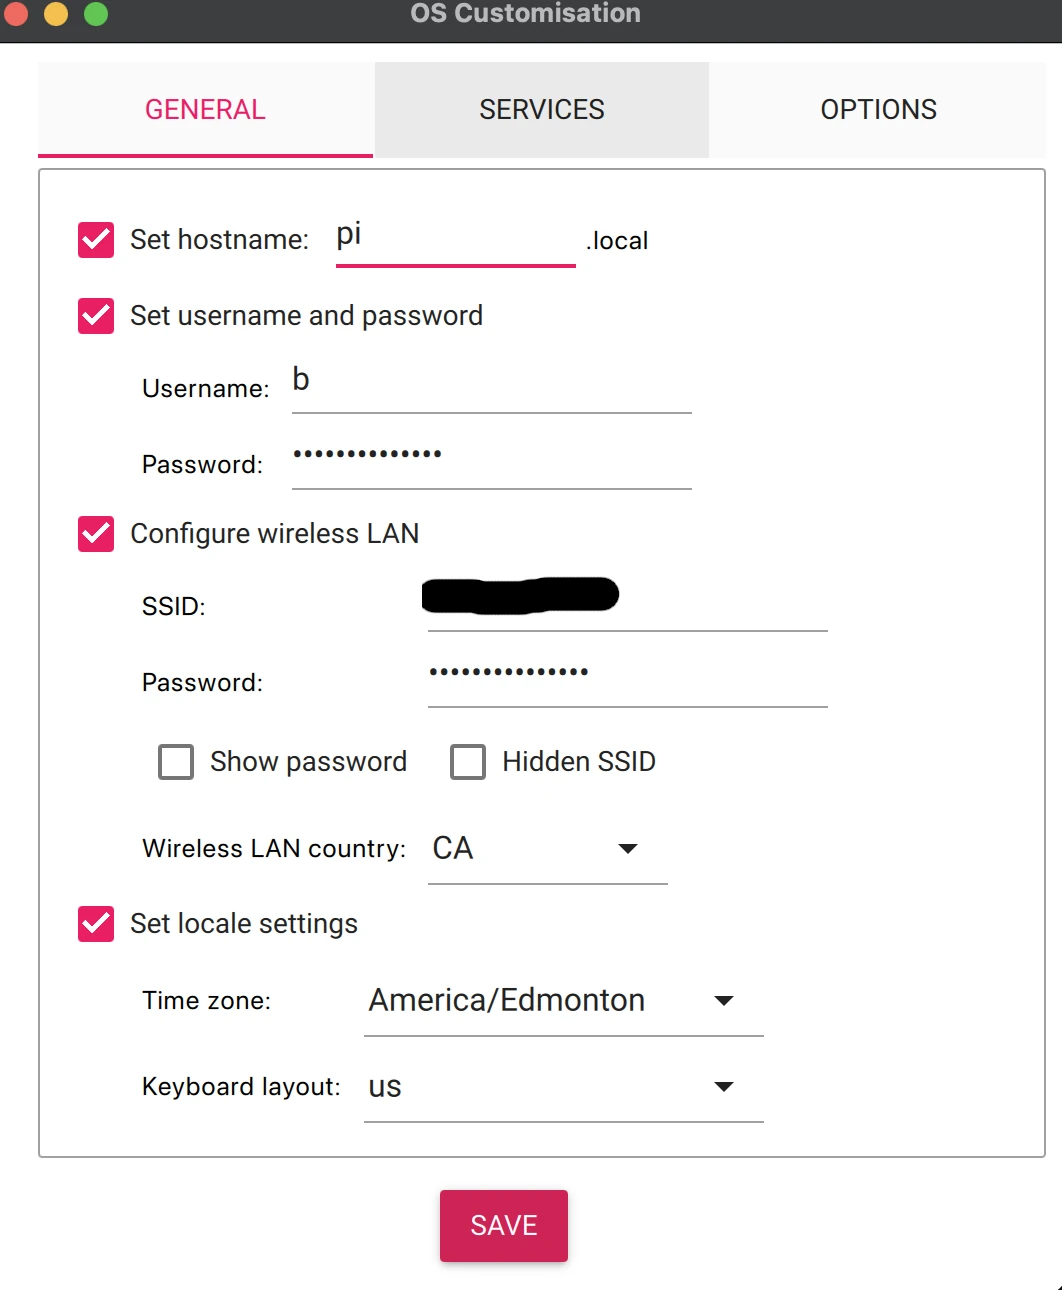
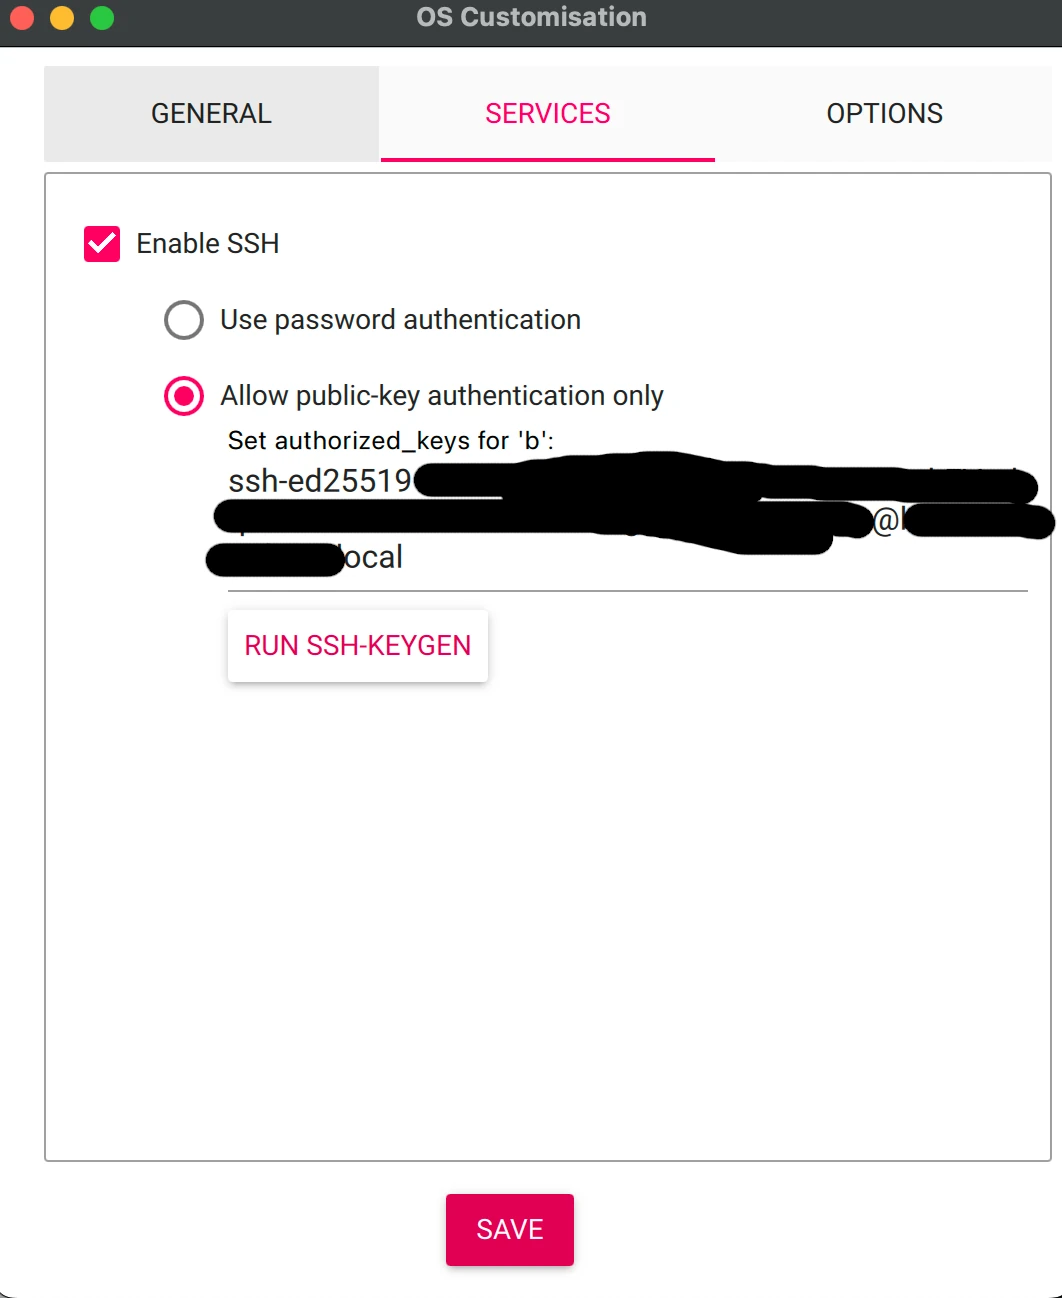
Save and start the image process which will take a few minutes.
Once that finished, we can begin setting up the PI. First to find the PI on your network you can use nmap to scan the network.
nmap -sn 192.168.1.0/24Once you find the PI, you can use ssh to connect to it.
ssh pi@192.168.1.100The first thing you should do is update the system and install a few packages.
sudo apt update && sudo apt upgrade -y
sudo apt install -y vim htop jq nmap tcpdump
The only other thing we really need to do to set up the PI is set up the nvme. Now I want to be clear an nvme is not ideal because suricata will constatnly be writing status logs to the drive and the nvme has limited write cycles (about 400) before it will wear it out and fail. Ideally like the Reddit post I will eventually replace it with a NAS that has mechanical drives. To setup the drive I will be using an Ext4 filesystem. Make sure to wipe the drive with shred and configure it with a partition table using your prefered tool such as fdisk.
sudo mkfs.ext4 /dev/sda1
sudo mkdir /nvme
sudo mount /dev/sda1 /nvme
sudo vim /etc/fstab
Add the following to the fstab file.
/dev/sda1 /nvme ext4 defaults 0 22. Setting up Suricata
Unlike the Reddit post I will be downloading a binary version of Suricata rather than building from source. The first thing you need to do is add the repository to your sources.
sudo vim /etc/apt/sources.listAnd add the following to the file.
deb http://ppa.launchpad.net/oisf/suricata-stable/ubuntu bionic mainNote
This is the bionic version of the repository which has support until 2028.
Now we need to install the repository key.
sudo apt-key adv --keyserver keyserver.ubuntu.com --recv-keys E1DF1F24
sudo apt update
Now we can install Suricata.
sudo apt install -y suricata
sudo suricata --build-info # check the version of suricata
The setup process is pretty easy all we have to do is modify a config file telling suricata where to store the logs, add a user and group for better security, and fetch some updated rules that will detect a lot of common attacks.
# add a user and group for suricata
sudo useradd --no-create-home --system --shell /sbin/nologin suricata
sudo chgrp -R suricata /etc/suricata
sudo chmod -R g+r /etc/suricata
sudo chgrp -R suricata /nvme/suricata
sudo chmod -R g+rw /nvme/suricata
sudo chmod -R g+srw /var/lib/suricata
sudo chgrp -R suricata /var/lib/suricata
sudo chgrp -R suricata /var/run/suricata
sudo chmod -R g+srw /var/run/suricata

# modify the config file to use wlan0 instead of eth0 if using wifi dongle
#sudo grep -n "eth0" /etc/suricata/suricata.yaml
#sudo sed -i 's/eth0/wlan0/g' /etc/suricata/suricata.yaml
#sudo grep -n "wlan0" /etc/suricata/suricata.yaml

# edit the config file to change user and defautl log location
sudo vim /etc/suricata/suricata.yaml

# test the config
sudo suricata -T -c /etc/suricata/suricata.yaml

# update the rules
sudo suricata-update

# restart suricata
sudo systemctl restart suricata
You will make these edits in the suricata.yaml file.
#change the default rule path
default-rule-path: /var/lib/suricata/rules

#change the user and group
user: suricata
group: suricata

#log location
default-log-dir: /nvme/suricata/
The first thing you should do after setting up suricata is to test it.
# test the nids by sending a request to tor
curl qwerty.onion
curl http://testmynids.org/uid/index.html
nmap -T4 -F 10.0.0.1
tail -f /nvme/suricata/eve.json | jq .
tail -f /nvme/suricata/fast.log
You should see the request in the eve.json file and the fast.log file if all is configured correctly. It worth going into more depth by reading the docs here at suricata docs. The standard format for rules is particularly interesting and worth understanding.
3. Setting up the PI to see all traffic
4. Data visualization options
- Elk stack run directly on PI (replacing logstash with fluent bit): This is the solution I'm going to be using because it should offer the best performance. However, i will be using fluent bit instead of logstash because it's more lightweight and easier to configure. I will also be running Kibana on my laptop (docker container) instead of the pi to save resources and ease of installation.
- ELK stack run via a docker container: I had some issue with with approach both following the reddit post, and attempting to use the elk-docker's image. The issue with the elk doctors was that it was only for amd64 architecture, and the raspberry pi is arm64. There is a way to build it for arm64 using a git repo he provides, but as noted in the docs it's not for the OSS version, so that's out. The other method was downloading indvidual docker images for each part of the elk stack and runnign them on the pi, but i also had issues with that. I eventually found legit images for arm64 (after digging through some tags), but when i went to run them I still had issues with the version of arm. The other issue with docker in general is it's not a lightweight solution, and i don't really see the benifit of containization for this project at least on the PI. If you do decide to use docker for this project follow the installation here Docker installation and make sure to add your user to the docker group
sudo usermod -aG docker $USER. - Grafana: I'm not going to be using this because I'm not going to be using the ELK stack, but it is another lightweight option.
- td-agent-bit: This is a lightweight log shipper that is similar to fluent bit, but it's not as feature rich. It's also not as easy to configure as fluent bit.
4.1 Setting up Elasticsearch on the PI
As per the instructions on the Elasticsearch website we need to install the repository key and then install the package.
wget -qO - https://artifacts.elastic.co/GPG-KEY-elasticsearch | sudo gpg --dearmor -o /usr/share/keyrings/elasticsearch-keyring.gpg
sudo apt-get install apt-transport-https
echo "deb [signed-by=/usr/share/keyrings/elasticsearch-keyring.gpg] https://artifacts.elastic.co/packages/8.x/apt stable main" | sudo tee /etc/apt/sources.list.d/elastic-8.x.list
sudo apt-get update && sudo apt-get install elasticsearch
Once that is installed we need to enable the service and start it.
sudo systemctl daemon-reload
sudo systemctl enable elasticsearch
sudo systemctl start elasticsearch
sudo systemctl status elasticsearch
# check the logs to ensure everything is up and working correctly
sudo journalctl --unit elasticsearch
4.2 Setting up Fluent Bit (instead of logstash)
Install as per the instruction on the Fluent Bit website.
curl https://packages.fluentbit.io/fluentbit.key | sudo apt-key add -
echo "deb https://packages.fluentbit.io/raspbian/bullseye bullseye main" | sudo tee /etc/apt/sources.list.d/fluentbit.list
sudo apt update
sudo apt-get install fluent-bit

# enable the service and start it
sudo systemctl enable fluent-bit
sudo systemctl start fluent-bit
sudo systemctl status fluent-bit
4.3 Setting up Kibana in a docker container on my laptop
Since Kibana is a web interface for Elasticsearch we can install it on the laptop or desktop machine rather than directly on the pi to save resources and connect it to the elasticsearch instance on the pi.
first you need to install docker on your laptop. The npull the latest image of the offical kibana image.
docker pull kibana:7.17.27Start the image to make sure it's working correctly. I did this via the GUI setting the port to 0 for random port assignment.
5. Automating a few tasks on the PI
There's a few things to finish up and automate with cron jobs.
- rotate the logs weekly
- Automaticly update raspberrian once per week
- Automaticly fetch new nids rules every night
6. A step further with a way to inform you of the attacks
I wanted an additional way to be alerted of attacks, so I'm going to be using an SMS service to send me a text message when an attack is detected. I'm going to be using the Twilio API to send me a text message. This is very simple setup all ihave to do is run a service that checks for new messages and runs a script that will send a request to the Twilio webhook, which will then send a text message to my phone.
7. Adding An additional shield to the PI
For this I'm going to build my own shield using EasyEDA. The sheild will consist of two main parts a power supply and a switchs for leds. The power supply will take in 12 Volts from a 1A wall wart, it will have a plug for an always-on 12v fan, and a buck converter set to 5v to power the PI. The switchs will be used to turn on the leds and alert me of attacks. For the switchs I'm going to purposly misconfigure mosfets to make them impossible to turn off once they are turned on. This way I can i be sure an attack happens because a remote attacker wouldn't be able to turn them off assuming they successful hacked the PI without cutting power to the house, or pressing a physical button. Let me explain how this works.
A mosfet turns on when a voltage is applied to the gate, and turns off when the voltage is removed. For this to work there must be a a path for the voltage to discharge otherwise the mosfet stays on because of gate capacitance. Normally for a 12v mosfet you would connect the gate to it's drive circuit in this case a GPIO pin (on the PI) to an opticoupler to the gate, and also connect the gate to a 1OKohm resistor and then to ground (source pin of the n-channel mosfet). This way when the GPIO pin is high the mosfet will turn on and when it's low the mosfet will turn off. However what is normally an incovince will instead be a feature on my shield. Between the 10Kohm resistor and the ground we will add a momentary switch which will prevent the mosfet from ever turing off once it has been turned on.

The power supply is straight forward. I will connect a 12V wall wart via barrel jack to the sheild, then use a buck converter to efficently drop the voltage to 5v. The only thing to note is that the buck converter is a high frequency switching device and will emit a lot of electromagnetic interference (EMI) which can interfere with the PI's wifi and microcontroller. For now I'm going to wing it and see if it works because I don't have a full EMI test setup (full spectrum analyser and antenna, faraday cage, etc).
Additionally I will connect a 12v fan to the sheild using the standard 4 pin JST fan connector, the pi itself will connect to the shield via it's expossed pins, all i need for this is one GPIO pin, any 5V pins and any ground pins exposed on the PI.